How to Rescue an Acrylic Cardigan from Accidental Machine Washing

I have already outlined how to rescue acrylic knits from a hot spin cycle, but I did not think that the method could save anything more intricate than my garter blanket.

How wrong I was! Using the same methods, I have rescued a lovely handknit cabled cardigan my Nan accidentally put on a hot wash. I took some pictures and thought I’d share, as I now have access to a bath, which made the whole process a lot more streamlined and photogenic.

The primary problem with the cardigan was the squeakiness, which was beyond even my tolerance, and the tightness of the partially melted fibres. The first thing to do was to soak, so I mixed some lukewarm water with shampoo and hair conditioner (might as well clean at the same time!). Then I gently pushed the unbuttoned cardigan into the water and left it for 10 to 15 minutes.

image

When thoroughly soaked, I poured neat conditioner onto the fabric near the surface and massaged it gently into the wool, rubbing in short motions from collar to hem and back again. Then I opened the cardigan up, applied more conditioner and rubbed it into the other side of the fabric (the inside of the cardigan), finally I rolled the whole cardigan over and applied and massaged into the back.

image

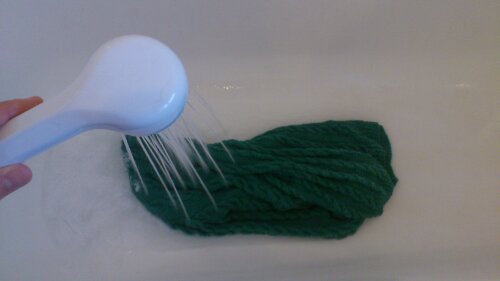
Then, after a five minute soak, I put my palm on the fabric, fingers spread, and agitated the stitches from side to side. I did this all over, to every square foot of fabric, for about 20 minutes in total. Then, 5 minutes more soaking, and a lukewarm shower to rinse out excess hair products.

image

Then, I rolled it in a towel to squeeze out excess water, and lay it out flat to dry. The result is a much softer, more relaxed fabric that is significantly more comfortable to wear, and one which feels a lot closer to the fluffy fabric that went in the fateful washing machine than the cling film that came out.

Knitting a Jumper on the Prym Knitting Mill

This piece is knitted in 100% lambswool because it was all I had in sufficient quantity, but could just as easily be made in acrylic. The fun bit is as the large bits were knitted on a machine it took 5 evenings or so to complete.

The red lines show 3x 42 stitch panels, knitted on the mill. They are knitted until they are as long as the distance from armpit to hip, then seamed together into a tube using mattress stitch.

The yellow lines are 2x tubes, knitted on the mill. They are knitted until they are as long as the distance from armpit to wrist.

The green sections marked 6, 7 and 8 are edging that I hand knit onto the 3 tubes I am left with at this stage – the mill does not cast off, remember. I chose k2 p2 ribbing, just because I like it. However, as this is the only embellishment you could do something more intricate.

Finally, section 9 in green is the handknit section. Joining the 3 tubes on one circular needle I proceeded to knit a raglan shoulder decrease in the round until I was left with 50 stitches. Then I k2 p2 ribbed until I had a sufficient collar and sewed in the loose threads.

This was my first try and so there were some issues:

– Getting equally sized pieces was tricky, I picked up the live edge of the shorter panels/tube and handknit a few rows until they were equal.

– Tension is crucial in knitting flat patterns on the mill, and being a beginner I ended up with a few holes I had to sew up in the middle of the torso of my jumper. This feels like a practice makes perfect type problem.

Overall, a successful and wearable jumper was the result, it’s a relatively straight forward project and it’s satisfying to see it grow so fast!

Got 600g of yarn and a few evenings spare? Give it a go!

image