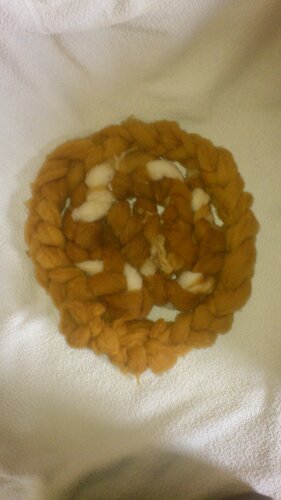
Dying Acrylic Yarn

This is another one of those “I saw this and HAD to share!” posts where I did not create the tutorial, but once I saw it on Ravelry, I knew I had to put it here:

And the blog it came from, which is CRAMMED with great craft ideas: http://thefrugalcrafter.wordpress.com/2014/02/15/how-to-dye-acrylic-yarn/

I’ve tried it out, and it is super easy! No boiling, no chemicals, no energy input – it is pretty much the easiest, cheapest and safest way to dye synthetic yarns.

Once it is dry and knitted up, I will add the pictures, for now here it is drying:

home dyed pink black white yarn

How to Rescue an Acrylic Cardigan from Accidental Machine Washing

I have already outlined how to rescue acrylic knits from a hot spin cycle, but I did not think that the method could save anything more intricate than my garter blanket.

How wrong I was! Using the same methods, I have rescued a lovely handknit cabled cardigan my Nan accidentally put on a hot wash. I took some pictures and thought I’d share, as I now have access to a bath, which made the whole process a lot more streamlined and photogenic.

The primary problem with the cardigan was the squeakiness, which was beyond even my tolerance, and the tightness of the partially melted fibres. The first thing to do was to soak, so I mixed some lukewarm water with shampoo and hair conditioner (might as well clean at the same time!). Then I gently pushed the unbuttoned cardigan into the water and left it for 10 to 15 minutes.

image

When thoroughly soaked, I poured neat conditioner onto the fabric near the surface and massaged it gently into the wool, rubbing in short motions from collar to hem and back again. Then I opened the cardigan up, applied more conditioner and rubbed it into the other side of the fabric (the inside of the cardigan), finally I rolled the whole cardigan over and applied and massaged into the back.

image

Then, after a five minute soak, I put my palm on the fabric, fingers spread, and agitated the stitches from side to side. I did this all over, to every square foot of fabric, for about 20 minutes in total. Then, 5 minutes more soaking, and a lukewarm shower to rinse out excess hair products.

image

Then, I rolled it in a towel to squeeze out excess water, and lay it out flat to dry. The result is a much softer, more relaxed fabric that is significantly more comfortable to wear, and one which feels a lot closer to the fluffy fabric that went in the fateful washing machine than the cling film that came out.

My First Pattern Design!

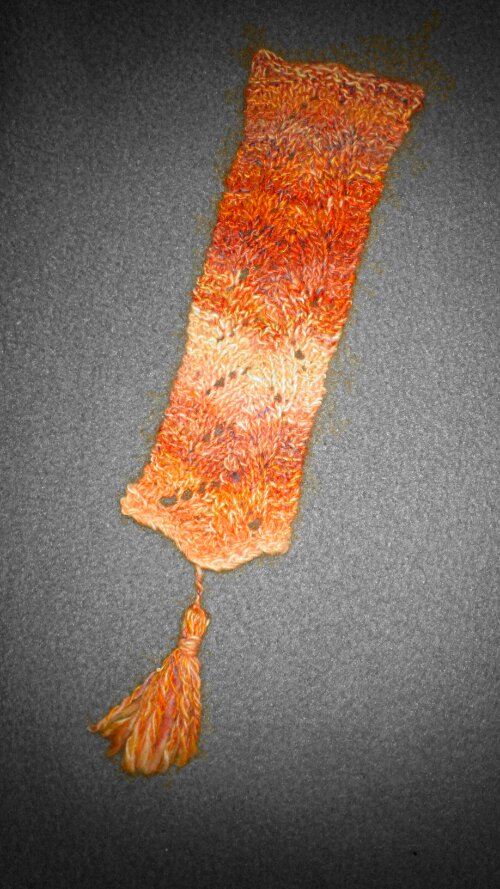
I’ve been designing a lot of knits recently, but the only one that’s ready to share is this lacy little bookmark. I made it out of some handspun I had recently plyed.

image

This is my first pattern so if you try it out please let me know how it went, if you liked it and if you encountered any problems – basically, any feedback is welcome!

http://www.ravelry.com/patterns/library/horseshoe-bookmark

Heat Setting Twist in Handspun Yarn

I have previously experimented in setting methods and found that heat can be handy. This makes sense, as commercial wool is fixed into its final twist using “heat setting”. The process is basically steaming at high temperatures in order to stop torquing, i.e. that annoying wrapping around itself yarn does when freshly spun or plyed.

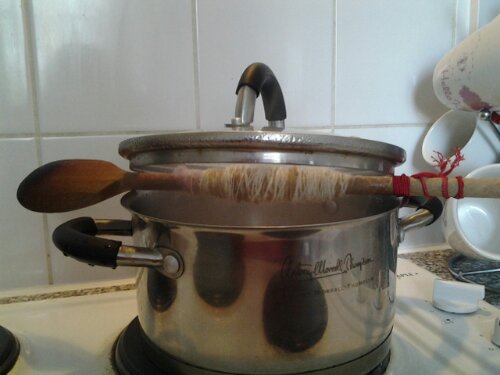
This process is relatively easily replicated in the kitchen, with a wooden spoon and a pan with a lid.

Wind the freshly spun single or freshly plyed yarn around the middle of the spoon handle, then secure the loose end, I used a hair bobble. Now bring some water to the boil in the pan (add a pinch of salt to increase the maximum temperature), balance the spoon over the top, and balance the lid so it half covers the pan.

image

Fixing a single takes a lot less time than fixing plyed yarn, with the small amount on here the single took 25 minutes and the plyed 2 hours. I think the wool was previously heat treated, though, and experiments with pure wool, previously untreated, were quicker and resulted in a nice, lofty yarn.

Below are (in order of appearance) previously heat treated and home dyed wool, merino-nylon blend and two commercial yarns I plyed together and heat set.

image

image

image

The synthetic blend and previously treated fibres react very well to heat setting in terms of not torquing, but they lose their stretch and softness. The pure wool did not, it stopped torquing and remains as soft and squidgable as the two yarns that make it up. It is not at all scratchy, or felted.

The safest way to set the twist, of course, is to leave it on the bobbin to rest, but if the process needs rushing, heat setting seems like a way forward!

Dying wool fibre with just coffee, water and vinegar

Knitting and coffee are two of my favourite things, and I discovered this morning that I can combine the two into one, awesome activity. I was googling to see if there was an easy way to dye wool fibre, as I have a lot of it and thought it’d be exciting to create my own colours, but many of the dying processes called for difficult, time consuming methods or chemicals I didn’t recognise and certainly didn’t have around the house.

So, I summarised all I had read, pared it down to what was in the cupboard and experimented. My most successful colourway resulted from an out of date jar of instant coffee diluted in three litres of water, in which I boiled 50 grams of wool top in my rice cooker.

image

image

I pre-soaked the wool in a 1 part vinegar 10 parts water solution for 45 mInutes and then just draped it oer a wooden spoon so alternating sections were submerged in the coffee. After 30 minutes I pulled the spoon to the back of the pot, removing some of the dyed wool from the coffee and left the remaining in for a further hour – this did not seem to make much difference, colour absorption seems to be at maximum after 45 minutes with istant coffee. I also had 25 grams fully submerged for the final hour and it turned out much the same colour as that with 30 minutes of exposure.

image

Here are the dry, plaited finished products ready for spinning. I am certain that strict adherence to chemistry and dye preparation could result in more vibrant colours, but as afternoon projects go, this one is quick, cheap, entirely non-toxic and super easy. Plus, your kitchen smells like a coffee shop, which I think is a bonus!

Antimicrobial Cleaning for Yarn?

As it was trying to hygienically clean a blanket after an illness that prompted the first post on this blog, I felt it would be appropriate to document my ongoing experiments with other antimicrobial cleaning methods and yarn.

I’m sure plenty of people might have sterilising fluid at the back of their cleaning cupboard, and if not it is cheaply purchased from most supermarkets and pharmacies. Most brands exist to quickly and safely sterilise baby equipment in cold water. Milton, which I used, is such a brand.

Now, arcrylic is made by spinning and carding very fine plastic fibres into yarn. It is plastic, like the equipment sterilising fluid is designed to clean, and it can survive cold water treatments very well, which is exactly what sterilising fluid requires of its sterilis-ees.

You can see where this is going.

First, a disclaimer, the only fabric for which Milton guarantee complete sterilisation is wipeable plastic protective clothing, THEY NEVER MENTION YARN, this is my experiment and I am not a microbiologist or chemical engineer – I AM IN NO POSITION TO GUARANTEE FULL STERILISATION ON YARN, EITHER.

Now that’s out of the way, I think compared to boiling this is more likely to produce a wearable fabric post-cleaning, and soaking plastic fibre for 12 hours in sterilising solution should kill most left over bugs to the tolerance of an average adult immune system.

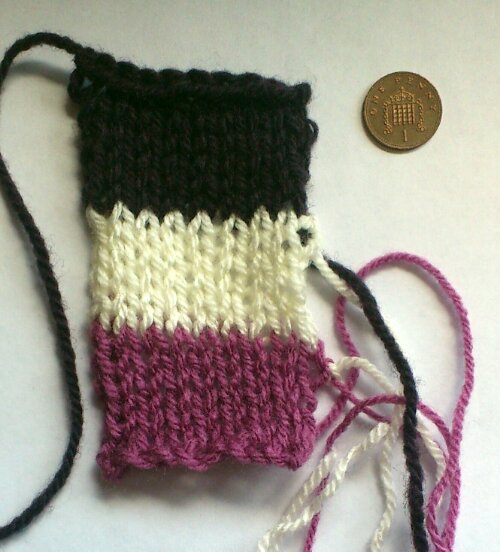
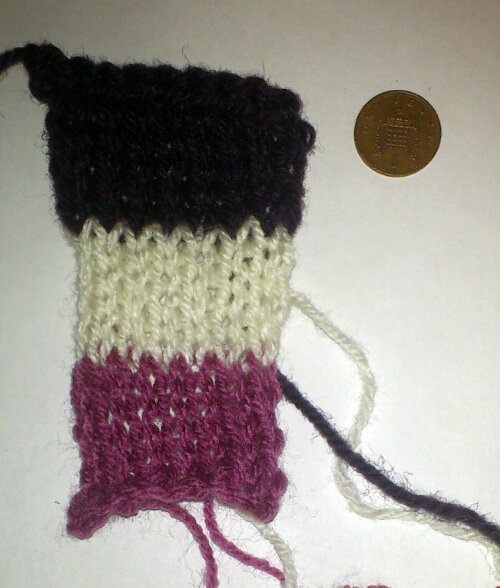
I made up a solution at the dilution Milton recommend for baby equipment and left a swatch in it overnight (15 minutes is sufficient to sterilise a smooth surface on a baby bottle, but the tightly wound fibres in yarn would need to be soaked and submerged for longer to reach all their surface area). The dark purple is a 50/50 wool/arcrylic blend, the cream and pink are 100% arcrylic – I chose the colours to test for colour-fast-ness and to see if the cream would take on any colour from the fluid.

As you can see in the before and after shots below, all the yarns survived and when rinsed in lukewarm water and a little hair conditioner (my fabric conditioner of choice) they blocked normally.

Now they’re dry they’re absolutely fine! Super soft and fluffy, thanks to the low temperature, and they have no smell – thanks to the low odour of the fluid. Even the wool blend seems fine, and Milton do say that their fluid can degrade the protein fibre of animal wool.

If anybody has any experience in this area, do comment and share – this is a new, experimental world for me!

Before:
image

After:

image

Lace with Acrylic

One of the main problems I have heard people encountering with acrylic is that it is difficult or impossible to block, and that lace is nigh impossible. I am sure I am not the first person to take this as a challenge, but I am going to offer a step by step guide to my variant on steam blocking designed for lasting results in even the cheapest acrylic.

1) First you need to knit some lace, I suggest a simple, circular pattern in DK or heavier knit on thick needles – the bigger the lace, the more dramatic the effect.

2) Now soak the finished piece and lay it out on a towel on a carpet or heat-proof surface – I have never wet then heated laminated wood but I think it would warp horribly…

3) Heat an iron, steam setting off, to 75% of its highest heat, and starting at the centre, iron out to the edge of the work. For points and details use the pointed end of the iron to pull out the finer parts of the lace.

4) When you have a shape you like, slowly move the iron over until almost dry, then pin tightly to a dry surface and leave for a few hours.

5) Enjoy!

Here is a picture of my latest piece, though I have been knitting doilies and blocking them this way for a good while.

image

Drying on the carpet

How to rescue arcrylic knitwear from the Accidental Spin Cycle.

I mentioned earlier that although slightly hardier than wool, arcrylic can be destroyed just as completely with the wrong care. It can, in some circumstances, be rescued. I shall now recount one such circumstance.

After feeling pretty ill, I did all the laundry on a 60 degree (centigrade) wash to make sure that any bugs were properly killed. Unfortunately, my handknit arcylic patchwork quilt was killed, too. Well, not quite. The fibers fused together and the spin cycle pulled all the stitches (previously a nice, thick garter stitch) into a thin, misshapen material that ressembled cling-film in its aesthetics, comfort and insulating properties. I was not amused.

However, I was not willing to give up (it is a lovely blanket) and I searched online – it was at this stage that I realised that there are not so many sources on the internet of advice on arcrylic knitwear and how to save it.  How to handwash, yes, but not how to undo the damage done.

Adapting advice aimed at vintage wool knitwear owners, I soaked the blanket in lukewarm water in which I had dissolved the leftover dregs of an assortment of hair conditioners and three capfuls of fabric conditioner (I have since realised that synthetic fibers probably don’t get all that much out of hair conditioner, but hey – I could certainly do no more damage than was already done). I then spread it out in the shower (new-builds don’t have baths, but I would have prefered to have put it in a bath) and left it soaking in its shallow pool of highly scented conditioning goo for a few hours.

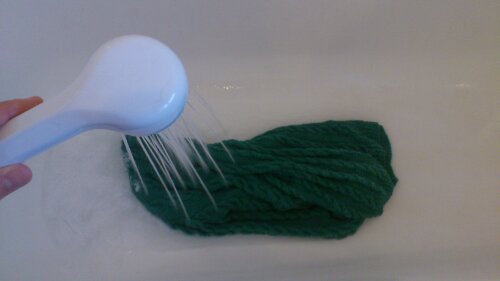
Next came the rinsing, which consisted of turning the shower on it (cool water setting) and leaving it to rinse thoroughly for about half an hour, with occasional light swilling and massaging so that the slightly fused fibers came apart. Then I turned it out onto a few towels, rolled it up like a Swiss Roll with the knitwear as jam and stood on it, forcing out the excess water. Finally, I laid it out on the hallway floor and spent a good hour lining up the rows of garter stitch so that it was thick and fluffy feeling again.

And I waited.

Three days later, it had dried completely and I was amazed. It had regained most of the springiness and fluffiness that garter stitch has pre-spin cycle and it felt much, much softer. I believe that the heat had not been the issue, but the spin cycle on the washer had been the main culprit – pulling all the stitches tight and drying them like that.

So as for advice, I suggest that if you need to wash arcrylic at a high temperature, 60 degrees (centigrade) is the absolute furthest frontier, and that so long as you handwash it in a bath and don’t agitate or pul the stitches too much, then it will survive such treatment. Of course, if you can avoid it, not machine washing or hot-washing knits is always the best way to do things.